How to Migrate a Website to RX-NAME.NET Hosting
Transferring the site to RX-name hosting
🔧 Step 1: Preparation
Before starting, make sure you have:
- A website archive (in .zip, .tar.gz, or similar format).
- A database dump (if your site uses a database).
- Access to the Plesk control panel.
- A domain linked to your hosting.
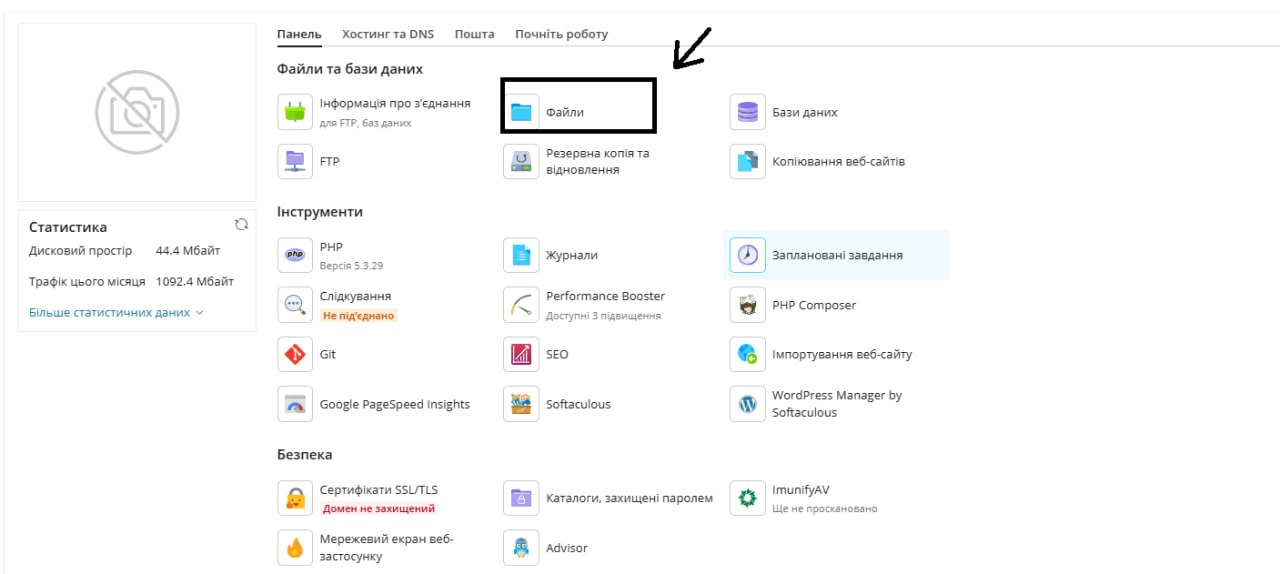
📂 Step 2: Upload Website Files
- Log in to the Plesk hosting panel and go to “Websites & Domains”.
- Select the desired domain and click “File Manager”.
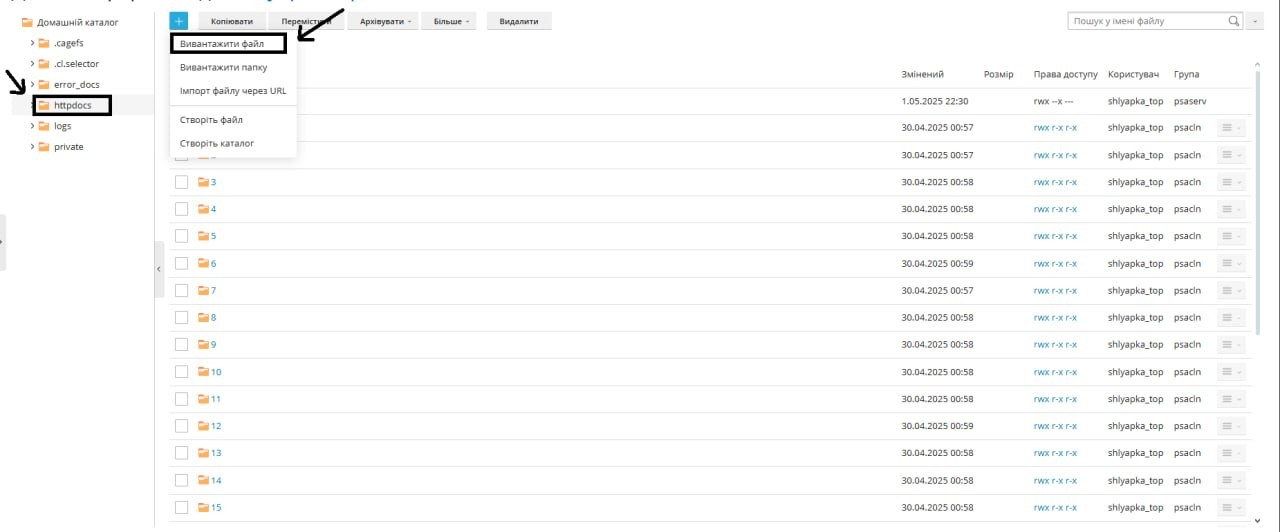
- Open the httpdocs folder — this is the root directory of your site.
- Click “Upload” and select the archive with your site files.
- After uploading, click the archive and choose “Extract Files”.
- Make sure the files are directly in httpdocs, not in a subfolder. If they are in a subfolder, move them to httpdocs.
🗄 Step 3: Import the Database (if needed)
- In Plesk, go to “Databases”.
- Click “Add Database”, enter its name, and create a user with a password.
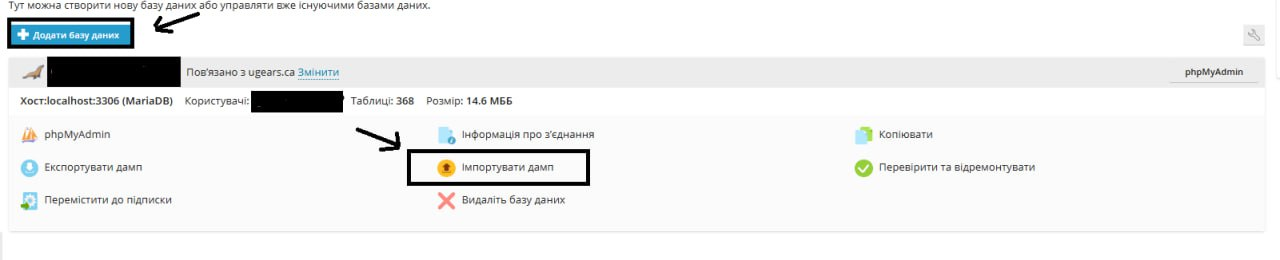
- After creating the database, click phpMyAdmin next to it.
- In phpMyAdmin, select the database, go to the “Import” tab, upload the dump file, and click Go.
⚙️ Step 4: Configure Your Website
- In the uploaded files, locate the configuration file (e.g., config.php, .env, or wp-config.php).
- Update the database connection settings:
- Database name
- Username
- Password
- Host (usually localhost)
Example of configuration for WordPress:

🌐 Step 5: Check and Launch the Website
- Make sure the domain is linked to the hosting and the DNS records are updated.
- Open a browser and navigate to your domain.
- Verify that the website loads correctly and works without errors.
Order virtual hosting here.